The Step-by-Step Process of Professional Cabinet Refinishing
Cabinets play a central role in both the aesthetic and functional aspects of any home. Over time, daily wear, moisture, and exposure to heat can take a toll on their appearance, leaving surfaces scratched, faded, or stained. While full replacement may seem like the only solution, professional cabinet refinishing offers a cost-effective and transformative alternative. This process not only revitalizes the look of your cabinets but also extends their lifespan, giving kitchens, bathrooms, and storage areas a fresh, modern appeal. Understanding the step-by-step process of cabinet refinishing can help homeowners make informed decisions and set realistic expectations for outcomes.
Professional cabinet refinishing involves a combination of surface preparation, repair, staining or painting, and finishing techniques, all executed with precision. Each stage is designed to ensure durability, a flawless finish, and long-term satisfaction. By breaking down the process into clear steps, homeowners and property managers can appreciate the value of skilled craftsmanship. Moreover, knowing what to expect can help avoid common mistakes, such as uneven coatings, peeling, or incompatible materials, that compromise the overall result. This blog will guide you through every phase of professional cabinet refinishing, offering insights into best practices, potential challenges, and expert tips that ensure a flawless, long-lasting finish.
1. Assessment and Planning
Initial Inspection and Evaluation
The first step in professional cabinet refinishing is a thorough evaluation of the existing cabinetry. This includes examining the type of wood, the condition of surfaces, the presence of water damage, and any structural issues like warping or loose joints. Professionals also assess the style and design of the cabinets, noting whether moldings, decorative trims, or glass inserts require special attention. This assessment helps determine whether refinishing is feasible or if certain components may need replacement.
Choosing the Right Refinishing Method
Based on the initial inspection, experts decide between various refinishing approaches. Options include stripping old finishes, sanding and staining, or applying a new coat of paint or lacquer. The choice depends on the desired final look, the type of wood, and the level of wear. For example, natural wood tones benefit from staining, while painted finishes are ideal for modern, uniform color updates. This planning stage ensures that materials, tools, and techniques align with the project goals.
Budgeting and Timeline Considerations
A critical part of the planning phase involves setting realistic expectations for time and cost. Refinishing is often less expensive than replacement but still requires a significant investment in labor, materials, and surface preparation. Professionals outline a project timeline, including drying periods between coats, which ensures that homeowners understand when their cabinets will be fully functional. Effective planning minimizes surprises and supports a smooth workflow throughout the refinishing process.
2. Preparation and Surface Treatment
Removing Hardware and Cabinet Doors
Proper preparation starts by removing all cabinet doors, drawers, and hardware, such as handles, knobs, and hinges. This ensures an even finish and prevents accidental damage to decorative hardware. Professionals label each piece to maintain organization and streamline reinstallation, reducing the risk of misplaced components or mismatched doors.
Cleaning and Degreasing Surfaces
Cabinets often accumulate grease, grime, and dust over time, particularly in kitchen environments. Thorough cleaning is crucial to ensure proper adhesion of primers, stains, or paints. Refinishing experts use specialized cleaning solutions designed to remove oils without damaging the wood. This step also allows them to identify hidden imperfections, such as minor cracks, dents, or water stains, that require attention before refinishing.
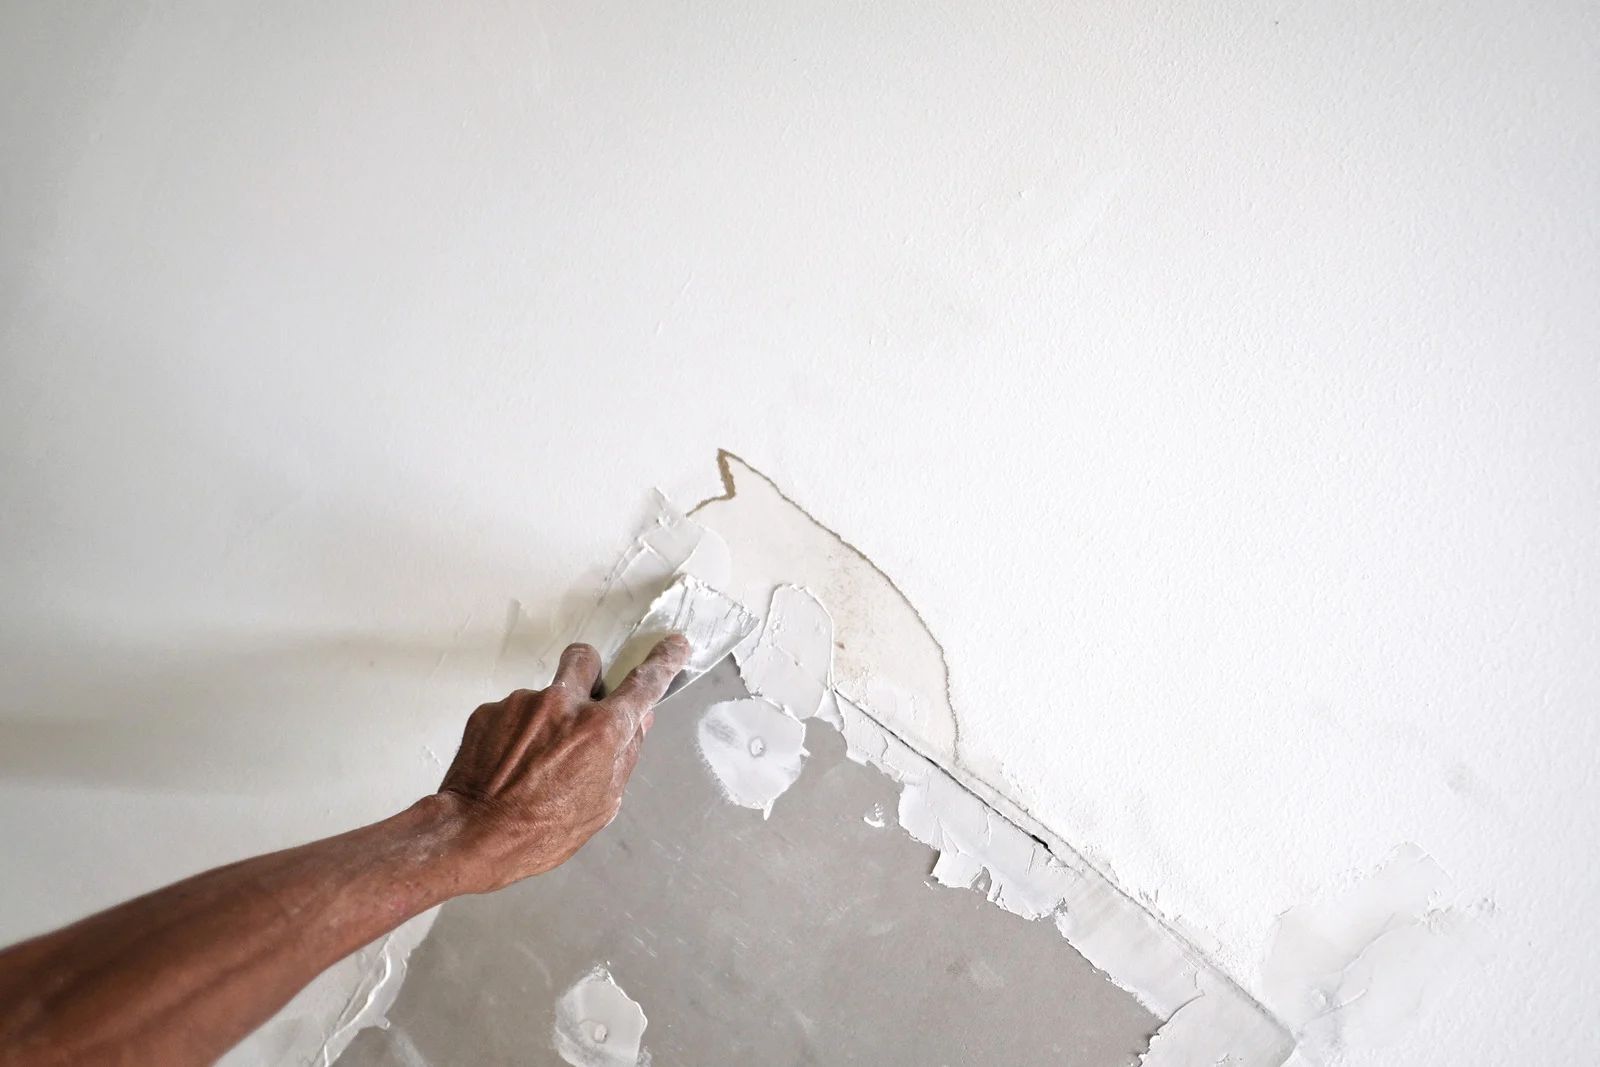
Sanding and Smoothing
Sanding is essential for removing old finishes, rough spots, and minor imperfections. Professionals typically use a combination of hand sanding and power tools to achieve a smooth, uniform surface. Proper sanding opens the wood’s pores, improving the absorption of stain or primer. This stage also sets the foundation for a long-lasting, flawless finish. Attention to detail during sanding can prevent common issues like blotching or uneven texture.
3. Repairing and Restoring Cabinet Surfaces
Filling Cracks, Holes, and Imperfections
After sanding, experts repair visible damage using high-quality wood fillers or putty. Cracks, dents, and holes are filled and sanded again to blend seamlessly with the surrounding wood. This ensures a consistent, professional finish, free of blemishes.
Reinforcing Structural Integrity
Cabinets that have experienced heavy use may have weakened joints or loose panels. Professionals reinforce these areas with wood glue, clamps, or additional fasteners to restore stability. Addressing structural issues before finishing prevents future problems, ensuring the cabinets remain functional for years to come.
Dealing with Specialized Features
Cabinet refinishing often includes attention to decorative details such as glass panels, carvings, or intricate moldings. Professionals carefully protect or restore these elements to maintain the cabinet’s character. For instance, glass inserts may be cleaned or replaced, while moldings are lightly sanded and treated to match the overall finish. Precision in this step ensures that every feature aligns with the final aesthetic.
4. Applying Primer, Stain, or Paint
Selecting the Appropriate Finish
The choice of finish determines both the appearance and durability of the cabinets. Wood cabinets may be stained to enhance natural grain, while painted finishes create a uniform, modern look. Professionals select high-quality paints, stains, or lacquers specifically designed for cabinetry, which resist chipping, fading, and moisture damage. Proper selection is critical for long-term results.
Applying Primer for Optimal Adhesion
Primer is applied when painting or when transitioning from a dark finish to a lighter color. It ensures strong adhesion, prevents peeling, and provides a smooth base for topcoats. Professionals typically use spray guns or brushes to achieve an even coat, paying close attention to corners, edges, and recessed areas. Allowing adequate drying time between primer and topcoat layers is essential for a flawless finish.
Staining Techniques for Wood Cabinets
When opting for a natural wood look, professionals use a combination of brushes, rags, and foam applicators to apply stain evenly. Techniques such as working in the direction of the grain and wiping excess stain prevent streaking and blotches. Multiple coats may be applied to achieve the desired depth and richness of color. Staining requires patience, as drying times and light sanding between coats are crucial for a smooth finish.
Painting Cabinets Professionally
For painted cabinets, multiple thin coats are preferred over a single thick application. Professionals use high-quality brushes, rollers, or spray systems to achieve even coverage without brush marks or drips. Between coats, light sanding helps remove imperfections and improves adhesion. A final coat provides depth, uniformity, and a polished appearance. Proper ventilation and dust control during painting further ensure a clean, professional result.
5. Sealing and Protective Finishing
Applying a Clear Coat or Topcoat
Protective topcoats, such as polyurethane or acrylic finishes, are applied to add durability and resistance to moisture, heat, and everyday wear. This final layer also enhances color vibrancy and provides a smooth, polished look. Professionals apply topcoats carefully, ensuring even coverage over all surfaces, edges, and corners. Depending on the material, multiple layers may be applied for maximum protection.
Sanding Between Coats
Between topcoat applications, light sanding removes imperfections like dust particles or brush strokes. This step is critical for achieving a flawless, professional finish that is smooth to the touch and visually consistent. Using fine-grit sandpaper ensures that the surface remains intact while improving adhesion for subsequent layers.
Curing and Drying Time
After finishing, cabinets are left to cure and dry completely. This stage is often overlooked but is vital for long-term durability. Adequate curing prevents premature chipping, peeling, or discoloration. Professionals advise homeowners on the recommended time before reinstalling doors, drawers, and hardware, ensuring that the refinished cabinets are fully set and ready for everyday use.
6. Reassembly and Final Touches
Reinstalling Doors, Drawers, and Hardware
Once the finish is fully cured, professionals carefully reattach doors, drawers, and hardware. Precision during reinstallation ensures proper alignment, smooth operation, and uniform gaps. Labels from the preparation stage make this process efficient and prevent mistakes like misaligned doors or mismatched knobs.
Quality Inspection and Touch-Ups
The final stage involves a thorough inspection of every surface, corner, and edge. Professionals check for any inconsistencies in color, texture, or finish, addressing minor issues with targeted touch-ups. This quality control step guarantees a professional, flawless result that meets high standards.
Maintaining Refinished Cabinets
Homeowners are often provided with maintenance tips to prolong the life of their refinished cabinets. Regular cleaning with non-abrasive solutions, avoiding excessive moisture, and gentle handling of doors and drawers help maintain the finish. Following professional guidance ensures that the cabinets retain their beauty and functionality for years to come.
Experience-Driven Cabinet Transformation by Trusted Experts
Professional cabinet refinishing is a meticulous process that transforms worn or outdated cabinets into visually stunning, durable features of a home. From initial assessment and surface preparation to painting or staining, protective finishing, and precise reassembly, every step is designed to ensure long-lasting quality and aesthetic appeal. Homeowners benefit not only from the cost-effectiveness of refinishing compared to replacement but also from a sustainable approach that preserves existing materials. Understanding this step-by-step process allows for better planning, informed decision-making, and appreciation of the expertise involved in achieving flawless results.
For homeowners seeking trusted, expert cabinet refinishing, Callapainter
is a reliable partner. Based in Madison, Wisconsin, with over 21
years of experience as a painting contractor, Callapainter
specializes in transforming kitchens, bathrooms, and storage areas through professional refinishing. Our team combines technical expertise, high-quality materials, and a keen eye for detail to deliver exceptional results. We guide clients through every stage—from initial consultation to final inspection—ensuring a smooth, stress-free experience. By choosing Callapainter, you gain a partner committed to durability, precision, and stunning visual results, making your cabinets a long-lasting centerpiece of your home.